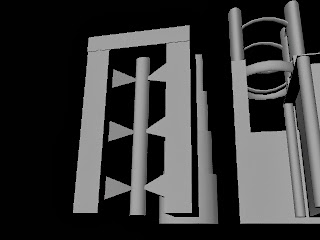
The initial reason why I signed up for the class was to learn 3D modeling and texturing, obviously, but more importantly, I wanted to learn how to composite my models into shots and bring those models into After Effects. So for my final I wanted to model something, anything, and bring it inside After Effects where I would animate, light, and do whatever was necessary in making that model look good. I recently discovered a plugin for After Effects called Element 3D. Essentially what this plugin does is it takes your 3D models into After Effects and allows you to animate, light, add shadows, and much more right inside of After Effects, including camera movement. This workflow was very simple and easy for me to use. Since I didn't know what to model, I modeled a bunch of different things that were physically around me such as a monitor, a flatscreen TV, a Playstation 4, and some games. I modeled some other things as well, but I used 3DS Max to model those specific ones.
A buddy of mine does a lot of 3D work, so he was able to help me out on this project. He showed me things that I could do in 3DS Max that weren't as difficult to use in Maya. I got to learn new plugins for Max and use some of the principles I learned in that program, in Maya as well. Basically I was using and learning 3 programs at once.
So for my final I ended up making a short video that basically revolves around the models I made. The video is the form of a commercial that keeps bouncing from product to product to product to the point where, as the viewer, you're not really sure what the commercial is advertising. My friend and I worked on the video this last weekend, and I think it turned out good (aside from the fact that there are low resolution shots in the video, but they don't really serve importance to the video as it was meant to show off the models I made).
Below are some screenshots of modeling, texturing, and animating while working on the project.
Finished model of the Monitor. Used a lot of beveling around the edges, and smoothed the leg of the monitor.
(In the screenshots you'll see different, plain-colored materials on all the objects. These were put there to isolate the parts of the model so Element 3D can detect them. From there, I would be able to texture right in Element 3D.)
The Television screen was the same model except the screen was made bigger, and I modeled a different stand.
In Element, I set a diffuse on the screen of both the monitor and TV. This allowed me to apply video the layer as a texture, which is how I got the screens to play videos.
Messing with some presets and custom effects in Element. I set a diffuse layer for each model in order to add the text on the models such as the Asus and Sony logos.
Here's the PS4. I used my own console as reference and sometimes referred to the Playstation commercials for accuracy. (Again, each part with materials on it was meant to isolate those parts for their own texures in AE.)
Here's the game case model. I UV mapped the red box with two different game covers for the video.
The chicken wings and Buffalo Wild Wings logo were both modeled in 3DS Max, then brought into Element.
The wax paper was essentially a plane I had made in Maya, with soft selection applied to it at random points.
 |
The chicken wing model with the wireframe shown on the left. I ended up sub-dividing this model 5 times, which gave it a high poly count.
 |
The Buffalo Wild Wings logo animation was essentially a thin cylinder that I made in Max ran through a physics simulation. I UV Mapped the logo onto the top of the cylinder, and the scene was lit with the Mental Ray plugin in Max.
The logo mapped onto the object, and the material file to use in Element.
Since Blogspot won't let me upload the video, here is the link to the video.
https://www.youtube.com/watch?v=ppTV3nishx8
Above everything else, the video is meant to show off the models and the work that was put into them. Yes, the video is very satirical and ironic as well (that was the point).
This project was fun to work on, and I enjoyed having the option to use 4 programs to complete it. 3DS Max is definitely different than Maya, but I can see the similarities in the two. Element 3D is a powerful plugin that makes 3D lighting and animating so much easier. I can't wait to use the techniques I used in this project in the future.
*All footage in the commercial belongs to me except for the Best Buy, Buffalo Wild Wings, and NBA commercials.*
Here are most of the models used in the video. All of them were modeled, lit, and textured by me, with the exception of the phones (those were a couple of starter models in Element 3D, but I still animated them).
All programs and plugins used for the video:
Maya, 3DS Max, Mudbox, After Effects, Photoshop, Premiere, and Element 3D.


